Present State of Ultrasonics
Ultrasonic testing (UT) has been practiced for many decades. Initial rapid developments in instrumentation spurred by the technological advances from the 1950's continue today. Through the 1980's and continuing through the present, computers have provided technicians with smaller and more rugged instruments with greater capabilities.
Thickness gauging is an example application where instruments have been refined make data collection easier and better. Built-in data logging capabilities allow thousands of measurements to be recorded and eliminate the need for a "scribe." Some instruments have the capability to capture waveforms as well as thickness readings. The waveform option allows an operator to view or review the A-scan signal of thickness measurement long after the completion of an inspection. Also, some instruments are capable of modifying the measurement based on the surface conditions of the material. For example, the signal from a pitted or eroded inner surface of a pipe would be treated differently than a smooth surface. This has led to more accurate and repeatable field measurements.
Many ultrasonic flaw detectors have a trigonometric function that allows for fast and accurate location determination of flaws when performing shear wave inspections. Cathode ray tubes, for the most part, have been replaced with LED or LCD screens. These screens, in most cases, are extremely easy to view in a wide range of ambient lighting. Bright or low light working conditions encountered by technicians have little effect on the technician's ability to view the screen. Screens can be adjusted for brightness, contrast, and on some instruments even the color of the screen and signal can be selected. Transducers can be programmed with predetermined instrument settings. The operator only has to connect the transducer and the instrument will set variables such as frequency and probe drive.
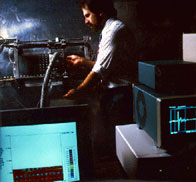
Along with computers, motion control and robotics have contributed to the advancement of ultrasonic inspections. Early on, the advantage of a stationary platform was recognized and used in industry. Computers can be programmed to inspect large, complex shaped components, with one or multiple transducers collecting information. Automated systems typically consisted of an immersion tank, scanning system, and recording system for a printout of the scan. The immersion tank can be replaced with a squirter systems, which allows the sound to be transmitted through a water column. The resultant C-scan provides a plan or top view of the component. Scanning of components is considerably faster than contact hand scanning, the coupling is much more consistent. The scan information is collected by a computer for evaluation, transmission to a customer, and archiving.
 Today, quantitative theories have been developed to describe the interaction of the interrogating fields with flaws. Models incorporating the results have been integrated with solid model descriptions of real-part geometries to simulate practical inspections. Related tools allow NDE to be considered during the design process on an equal footing with other failure-related engineering disciplines. Quantitative descriptions of NDE performance, such as the probability of detection (POD), have become an integral part of statistical risk assessment. Measurement procedures initially developed for metals have been extended to engineered materials such as composites, where anisotropy and inhomogeneity have become important issues. The rapid advances in digitization and computing capabilities have totally changed the faces of many instruments and the type of algorithms that are used in processing the resulting data. High-resolution imaging systems and multiple measurement modalities for characterizing a flaw have emerged. Interest is increasing not only in detecting, characterizing, and sizing defects, but also in characterizing the materials. Goals range from the determination of fundamental microstructural characteristics such as grain size, porosity, and texture (preferred grain orientation), to material properties related to such failure mechanisms as fatigue, creep, and fracture toughness. As technology continues to advance, applications of ultrasound also advance. The high-resolution imaging systems in the laboratory today will be tools of the technician tomorrow.