Image Quality Indicators
Image quality indicators are used in RTR for the same reasons they are in film radiography to measure the performance of technique and equipment. (As with film radiography, contrast changes (seeing small thickness changes) and definition in film radiography or spatial resolution in RTR is being able to see small anomalies.) Image quality indicators (IQI) such as plaque type and wire type pentameters can be used, but the orientation to the X-ray beam is critical. IQIs original use was to indicate quality with a still image, not with a moving image as with RTR.
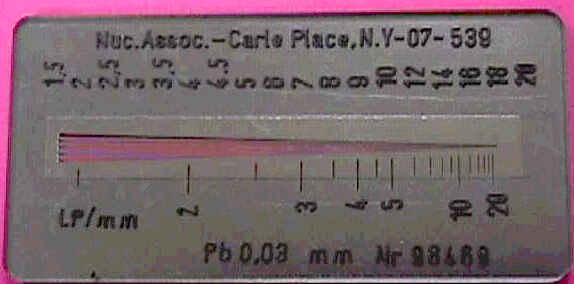
A line pair gauge is a device used in many radioscopic inspections (See Figure 16). This device indicates how many line pairs can be discerned in a width of one millimeter (.03937 inches). The resolving capability of an RTR system often is referred to as a certain number of LP, meaning LP/mm. Typical ranges are 2-5 LP/mm for conventional RTR systems and up to 20 LP/mm for microfocus RTR systems. Ten LP/mm indicates a space of .003937 inches (1 mm divided by 10). The line pair gauge is made of lead or gold and situated on a plastic base providing a good contrast. The lines at one end of the gauge are spaced widely and converge at the opposite end. When the separation of the lines no longer is visible, the perpendicular line closest to it is noted. Starting at the end of the gauge with the wide spaces, perpendicular lines are counted until no separation can be seen, and this number of lines is noted as well. With the gauge being used for this example, there are 18 perpendicular lines on one side and 18 corresponding numbers on the top opposite side. Matching the number with its line indicates the LP/mm. For instance, if the separation of lines cannot be seen beyond the mark between that labeled 3 and that labeled 4, this is 3 ½ LP/mm. If the limit of separation of the lines is one mark below the last mark where they converge or the 17th mark, this corresponds to 18 LP/mm because the 17th number down the scale is 18. In some instances, a part with an actual defect can be used as a check to see if the equipment is performing at a minimum level.

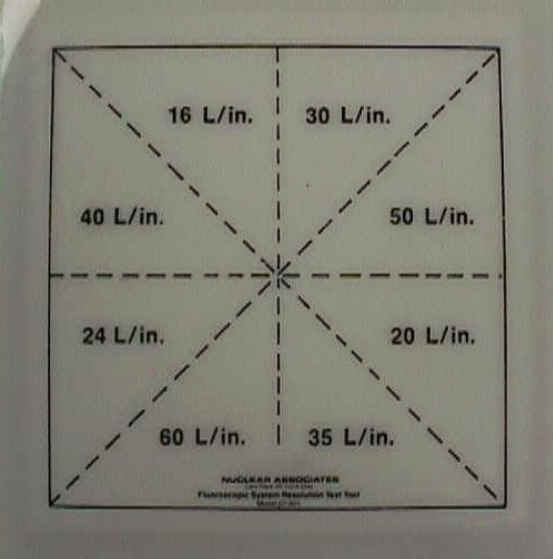
Another device made by Victoreen appears in Figure 17. This is a wire mesh LP gauge which is used to verify the resolution achievable by the system. This gauge reads in LP/in and can be placed directly on the image intensifier.

In summary, several different image quality indicators can be used, the most common being the LP gauge for spatial resolution and the step wedge for contrast sensitivity. Calibration blocks or actual test pieces with known discontinuities also are used. Some test procedures require a check of the image before and after each inspection shift.