Scanning
Eddy current data can be collected using automated scanning systems to improve the quality of the measurements and to construct images of scanned areas. The most common type of scanning is line scanning where an automated system is used to push the probe at a fixed speed. Line scan systems are often used when performing tube inspections or aircraft engine blade slot inspections, where scanning in one dimension is needed. The data is usually presented as a strip chart recording. The advantage of using a linear scanning system is that the probe is moved at a constant speed, so indications on the strip chart can be correlated to a position on the part being scanned. As with all automated scanning systems, operator variables, such as wobble of the probe, are reduced.
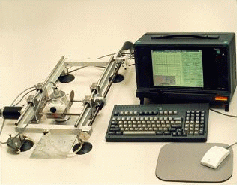
Two-dimensional scanning systems are used to scan a two-dimensional area. This could be a scanning system that scans over a relatively flat area in a X-Y raster mode, or it could be a bolt hole inspection system that rotates the probe as it is moved into the hole. The data is typically displayed as a false-color plot of signal strength or phase angle shift as a function of position, just like an ultrasonic C-scan presentation. Shown below is a portable scanning system that is designed to work on the skins of aircraft fuselage and wing sections.
 Listed below are some automated scanning advantages:
- minimizes changes in liftoff or fill factor resulting from probe wobble, uneven surfaces, and eccentricity of tubes caused by faulty manufacture or damage
- accurate indexing
- repeatability
- high resolution mapping